ElectricMotorcycleForum.com

  • April 24, 2024, 08:58:39 AM
  • Welcome, Guest
Please login or register.

Login with username, password and session length
Advanced search  

News:

Electric Motorcycle Forum is live!

Pages: 1 2 3 [4] 5

Author Topic: Installed my SuperCharger V2!  (Read 9334 times)

BrianTRice@gmail.com

  • Unofficial Zero Manual Editor
  • Hero Member
  • *****
  • Posts: 4014
  • Nerdy Adventurer
    • View Profile
    • Personal site
Re: Installed my SuperCharger V2!
« Reply #45 on: February 13, 2017, 05:36:06 AM »

I actually did move my lock to the side too. It's very simple, my own advice besides what's in the wiki is make sure you don't drill in to the plastic casing that's under the passenger seat. I ended up slightly clipping it with my drill. I didn't even know anything critical was under there.

Whoa. Yeah, good point. The wiki should definitely say that.
Logged
Current: 2020 DSR, 2012 Suzuki V-Strom
Former: 2016 DSR, 2013 DS

anton

  • Jr. Member
  • **
  • Posts: 97
    • View Profile
Re: Installed my SuperCharger V2!
« Reply #46 on: February 19, 2017, 01:19:31 AM »

@Chicamungo @Electric Cowboy What's the preferred way to route inlet wires back inside the bike when using power tank cover? Should I cut a bit of plastic on the side/center to feed the wire back or should I try fitting through the left/right part of the frame? There is some space there on both sides and connectors do fit through those spaces, but the wire might be pinched if you turn handlebars too far.
Logged

Shadow

  • Global Moderator
  • Hero Member
  • *****
  • Posts: 1085
  • 130,000mi electric since 2016
    • View Profile
Re: Installed my SuperCharger V2!
« Reply #47 on: February 19, 2017, 01:40:44 AM »

I'll have DSR tankbag, powetank, and chargetank cowls in my hands soon. I was going to sell the extra cowls as-is.

If a buyer sends an inlet I'll mount it up, make an install video, and ship the completed install.
Logged

Chicamungo

  • Newbie
  • *
  • Posts: 36
    • View Profile
Re: Installed my SuperCharger V2!
« Reply #48 on: February 19, 2017, 01:59:53 PM »

@Chicamungo @Electric Cowboy What's the preferred way to route inlet wires back inside the bike when using power tank cover? Should I cut a bit of plastic on the side/center to feed the wire back or should I try fitting through the left/right part of the frame? There is some space there on both sides and connectors do fit through those spaces, but the wire might be pinched if you turn handlebars too far.
I ended up drilling a couple of holes using a 1 1/2" hole saw. I drilled it right in the front black area. One up high to give enough space for the inlet to fit there, and one near the bottom to actually route the cable through. You may be able to do it using only one hole, but I didn't plan ahead.

I would advise against running it to the side. The cable is too thick and you wouldn't want that damaged or to prevent your handlebars from fully turning.
Logged

mrwilsn

  • Hero Member
  • *****
  • Posts: 693
  • 2014 Zero S / 2017 Zero SR
    • View Profile
Re: Installed my SuperCharger V2!
« Reply #49 on: February 19, 2017, 06:13:16 PM »

@Chicamungo @Electric Cowboy What's the preferred way to route inlet wires back inside the bike when using power tank cover? Should I cut a bit of plastic on the side/center to feed the wire back or should I try fitting through the left/right part of the frame? There is some space there on both sides and connectors do fit through those spaces, but the wire might be pinched if you turn handlebars too far.

If you are worried about turning your handle bars causing issues with your super charger install then something is wrong.

If you have a 2016 or older bike you should remove the tank bag lock.  Two screws and it comes right off.  Removing it keeps it from interfering with the J-plug wires.


The wires to the J-plug should stay completely under the tank.  If you are considering routing in between the frame and the handle bars such that it would get pinched by the triple tree or making extra holes in the tank (other than to mount the J-plug)....don't.  This is a picture of my SCv1 which is bigger than the SCv2 3.3 module and the cable fits under the tank you just need to route it such that the cable goes around the corner of the SC on the front right side but above the corner of the SC on the front left side.


If you are talking about the cables running from the SC down to the Anderson connector then it should also stay inside the bike.  Here you can see my cables (red black wires with a red connector) running below the frame and down to the Anderson connector. (Note that the J-plug cable is not routed correctly in this picture and the tank would not fit if I tried with this routing)


I used a charge tank instead of power tank but in either case you should just have one hole in your tank....where the J-plug will be mounted.  Here is my charge tank install.


Logged
2014 Zero S

Shadow

  • Global Moderator
  • Hero Member
  • *****
  • Posts: 1085
  • 130,000mi electric since 2016
    • View Profile
Re: Installed my SuperCharger V2!
« Reply #50 on: February 19, 2017, 08:49:23 PM »

@mrwilsn nice clear pictures thanks for sharing!   Can you say, what tools are needed and what locations need to be taken apart to remove the helmet lock?
Logged

Electric Cowboy

  • Hero Member
  • *****
  • Posts: 605
    • View Profile
    • Miller's Premium Brand Electrons : YouTube
Re: Installed my SuperCharger V2!
« Reply #51 on: February 19, 2017, 10:38:44 PM »

Mr Wilson nailed it. Anton was asking about the wires going to the DC charging port on the bike. Those cables go through the frame. As in Mr Wilson a photo.

Depending on your year model they will go through one side or the other. You can tell by looking, where there is more room.

Sent from my Nexus 6P using Tapatalk

BrianTRice@gmail.com

  • Unofficial Zero Manual Editor
  • Hero Member
  • *****
  • Posts: 4014
  • Nerdy Adventurer
    • View Profile
    • Personal site
Re: Installed my SuperCharger V2!
« Reply #52 on: February 20, 2017, 03:23:21 AM »

Thanks for the photos! I'm updating the wiki for this: http://zeromanual.com/index.php/Zero_Aftermarket#DigiNow_Super_Charger
Logged
Current: 2020 DSR, 2012 Suzuki V-Strom
Former: 2016 DSR, 2013 DS

mrwilsn

  • Hero Member
  • *****
  • Posts: 693
  • 2014 Zero S / 2017 Zero SR
    • View Profile
Re: Installed my SuperCharger V2!
« Reply #53 on: February 21, 2017, 10:00:21 AM »

@mrwilsn nice clear pictures thanks for sharing!   Can you say, what tools are needed and what locations need to be taken apart to remove the helmet lock?

The seat and the tank need to be removed to get at the tank bag lock on the 2016 and older bikes.  Tank bag lock doesn't exist for 2017 bikes due to the introduction of the lockable storage tank.

The seat has 2x 5mm allen head bolts (I think some bikes/years use Torx for the seat bolts but my 2014 Zero S and 2017 Zero SR use allen head).


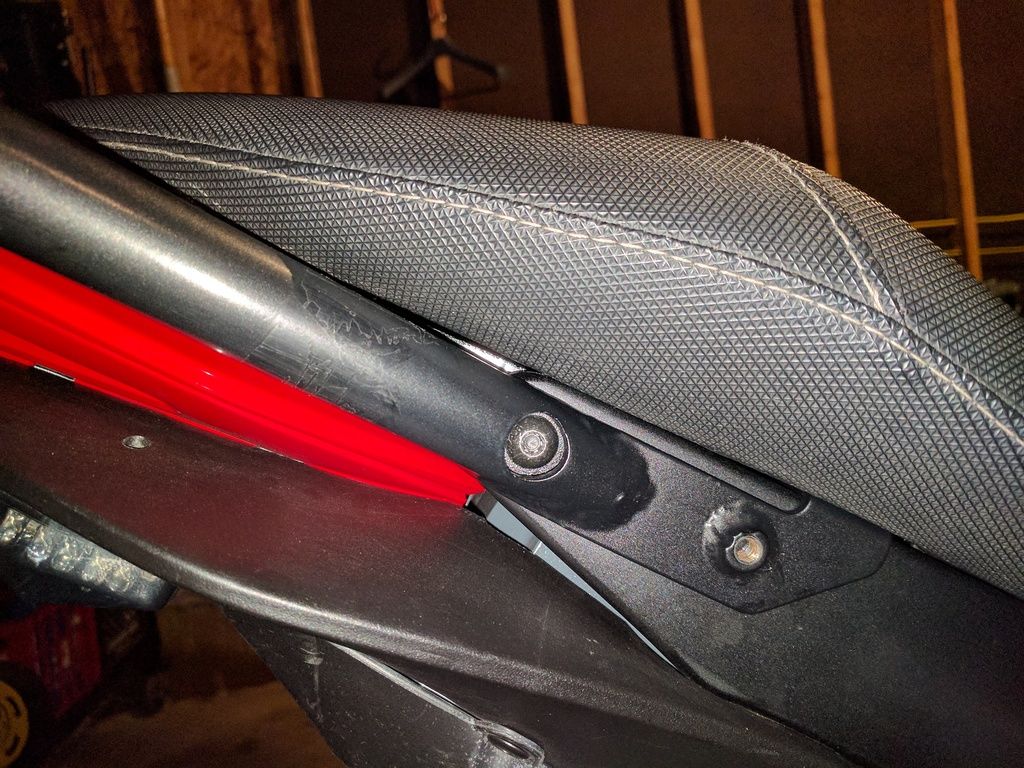
After removing the seat you have access to 2x 3mm allen head bolts on either side of the tank next to where it meets the seat.


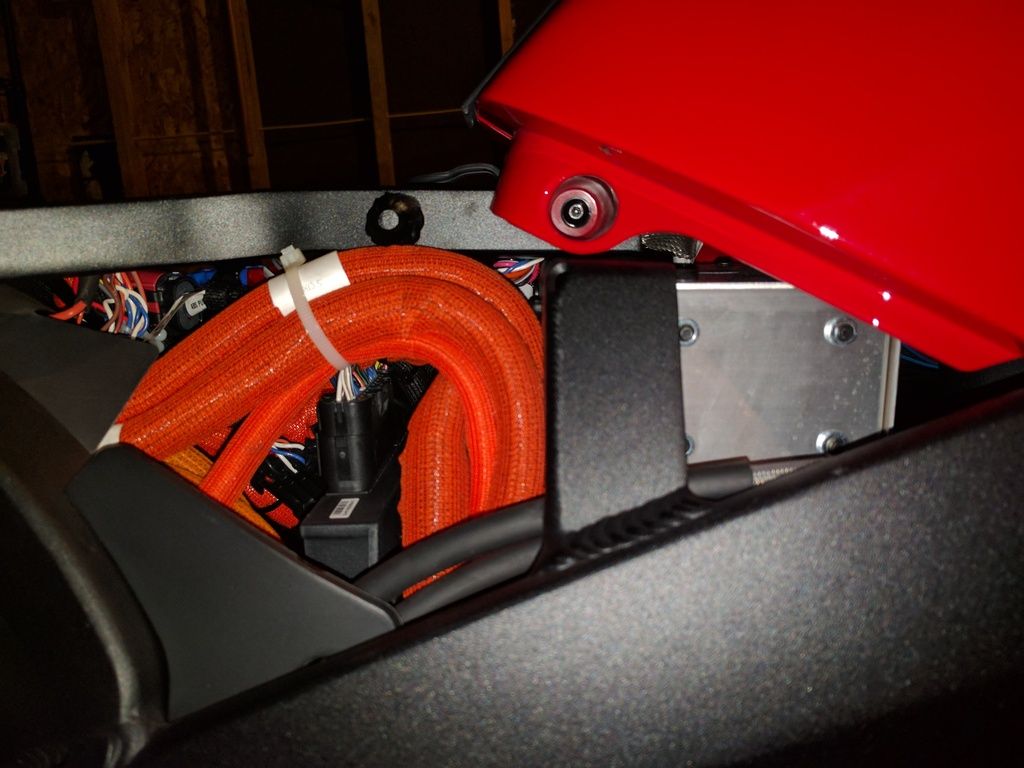
Then there are additional 2x 3mm allen head in the tank bag area.


Next are 6x Phillips head (PH2) on the tank 'bat wings' (one screw on each side is hidding in the hole at the bottom of the black plastic on the front of the tank).


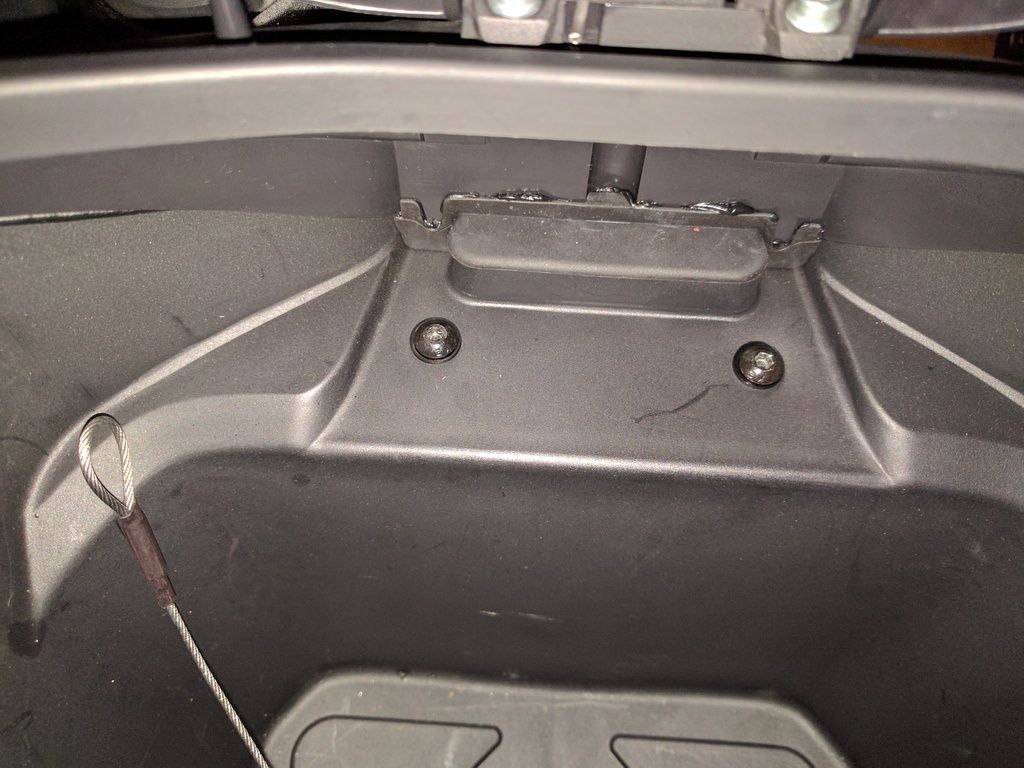
At this point you can remove the tank.  Optionally you can remove additional 2x 3mm allen head to remove the black plastic at the front of the tank above the horn.


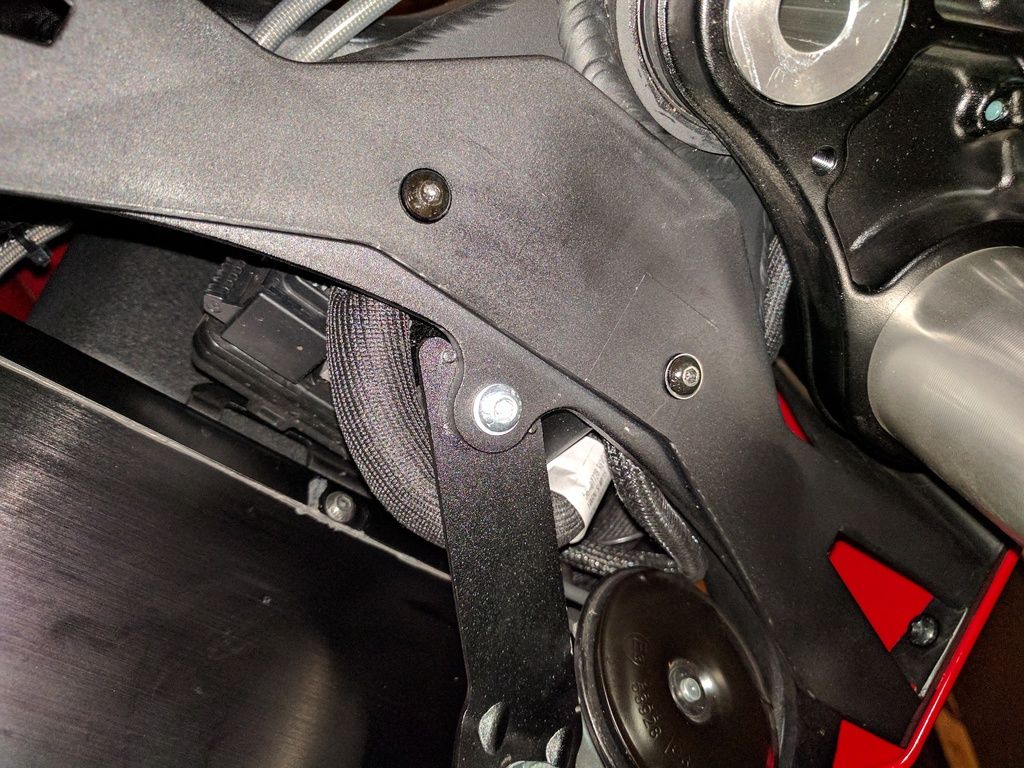
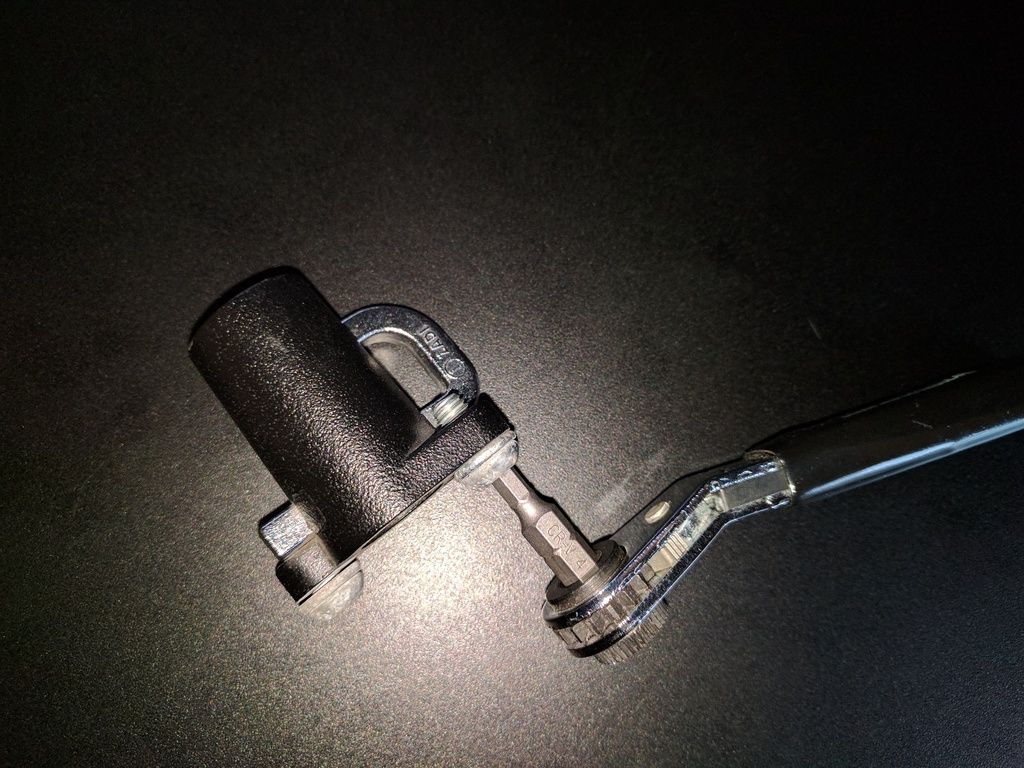
You may need to snip some zip ties to move some wire bundles around to get access to the 2x 4mm allen head bolts holding the tank bag lock in place from the bottom.
Logged
2014 Zero S

BrianTRice@gmail.com

  • Unofficial Zero Manual Editor
  • Hero Member
  • *****
  • Posts: 4014
  • Nerdy Adventurer
    • View Profile
    • Personal site
Re: Installed my SuperCharger V2!
« Reply #54 on: February 21, 2017, 10:44:54 AM »

@mrwilsn, may I use these photos and text on the wiki?
Logged
Current: 2020 DSR, 2012 Suzuki V-Strom
Former: 2016 DSR, 2013 DS

mrwilsn

  • Hero Member
  • *****
  • Posts: 693
  • 2014 Zero S / 2017 Zero SR
    • View Profile
Re: Installed my SuperCharger V2!
« Reply #55 on: February 21, 2017, 10:50:16 AM »

No...mrwilsn proprietary

Haha...JK....You may use anything I post

Sent from my Nexus 6P using Tapatalk

Logged
2014 Zero S

BrianTRice@gmail.com

  • Unofficial Zero Manual Editor
  • Hero Member
  • *****
  • Posts: 4014
  • Nerdy Adventurer
    • View Profile
    • Personal site
Re: Installed my SuperCharger V2!
« Reply #56 on: February 21, 2017, 10:53:59 AM »

No...mrwilsn proprietary

Haha...JK....You may use anything I post

That's awesome; I appreciate it. :)
Logged
Current: 2020 DSR, 2012 Suzuki V-Strom
Former: 2016 DSR, 2013 DS

anton

  • Jr. Member
  • **
  • Posts: 97
    • View Profile
Re: Installed my SuperCharger V2!
« Reply #57 on: February 21, 2017, 11:58:22 AM »

@Chicamungo: Silly question, where are your brake lines on the right side? My 2016 SR has them but I can't see them on any of your photos. So far they've been the most painful thing to deal with.

Logged

Electric Cowboy

  • Hero Member
  • *****
  • Posts: 605
    • View Profile
    • Miller's Premium Brand Electrons : YouTube
Re: Installed my SuperCharger V2!
« Reply #58 on: February 22, 2017, 12:48:31 AM »

@anton wow you have a fair amount of extra line in there

Sent from my Nexus 6P using Tapatalk

Chicamungo

  • Newbie
  • *
  • Posts: 36
    • View Profile
Re: Installed my SuperCharger V2!
« Reply #59 on: February 22, 2017, 10:06:16 AM »

@Chicamungo: Silly question, where are your brake lines on the right side? My 2016 SR has them but I can't see them on any of your photos. So far they've been the most painful thing to deal with.


You can see in this shot where the brake line originates off of the right handlebar. But it follows the fork down to the brake on the wheel. It was never an issue for me. I didn't even realize that could be a problem! Sorry man, I didn't run in to this problem. Are all 2016 bikes run like that with their brake line?
Logged
Pages: 1 2 3 [4] 5